Frame selection starts with geometry, not taste. A frame can look refined on the tray and still perform poorly if the lens centers, bridge position, temple length, or rim shape conflicts with the face that has to carry it all day.
The practical method is a sequence: establish the optical requirements, map the face in three dimensions, apply geometric contrast, then test whether the prescription allows the chosen shape. That order keeps styling useful without letting fashion outrank vision.
The Structural Importance of Proper Frame Fit
Proper frame fit affects optical performance before it affects appearance. When the optical center of each lens sits where the pupil actually looks through the lens, the wearer gets the prescription the prescriber intended. When the frame drifts low, wide, or forward, the lens may still contain the correct power, but the eye is no longer using it through the intended point.
In fitting assessments, a repeat pattern appeared in patients reporting asthenopia: oversized frames often placed the optical centers too low. The result was not simply a cosmetic mismatch. Patients described eye fatigue, a sense of working harder to focus, and occasional blur during sustained near tasks.
Optical center alignment
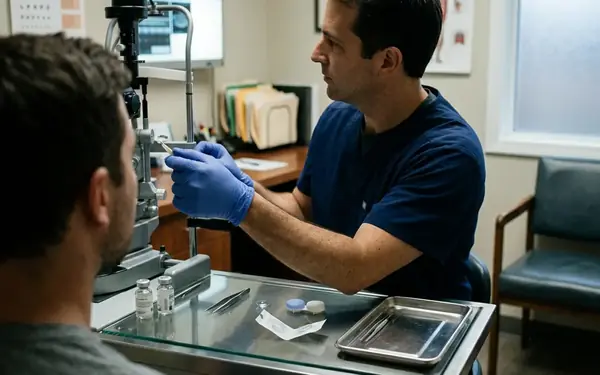
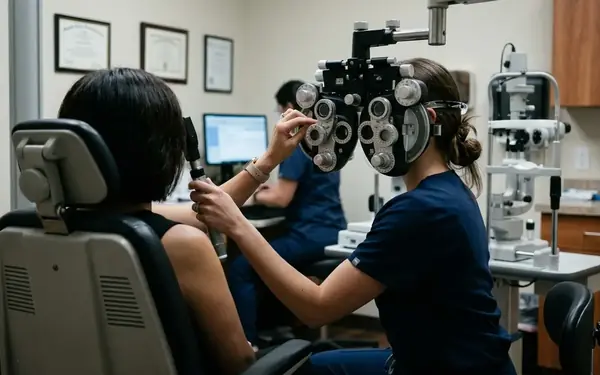
The fitting sequence begins with the pupil, not the frame brand. The optician verifies where the pupil sits behind the demonstration lens and checks whether the frame can hold that alignment during normal wear. A frame that slides down the nose during conversation will not hold a stable optical center position during reading, driving, or screen use.
Pantoscopic tilt also matters. In clinical fitting, the practical target is commonly adjusted between 8 and 12 degrees so the lens plane follows the wearer’s natural line of sight. Vertex distance should remain between 12 and 14 millimeters; when the lens sits too far from the eye, effective power and peripheral experience can change, especially in stronger prescriptions.
Bridge and temple load
Weight distribution decides whether a patient keeps the glasses on or starts removing them by lunch.
The bridge should carry weight without pinching. The temples should stabilize the frame without pressing into the temporal bones or mastoid area behind the ear. A technically correct lens inside a poorly balanced frame still becomes a poor daily tool.
Clinical Frame Fit Verification Checklist
- Verify optical center aligns precisely with the pupil center.
- Check that vertex distance measures between 12 and 14 millimeters.
- Ensure temples do not indent the temporal bones or mastoid process.
- Confirm the lower rim does not touch the cheek during a natural smile.
- Review lens material and frame material together, using authoritative guidelines on eyeglasses and frame materials when patients need a broader explanation.
Critical Insight: A frame that “almost fits” often fails at the same place every day: the bridge slips, the pupils sit above the optical centers, and the wearer blames the prescription instead of the geometry.
Analyzing Facial Proportions and Bone Structure
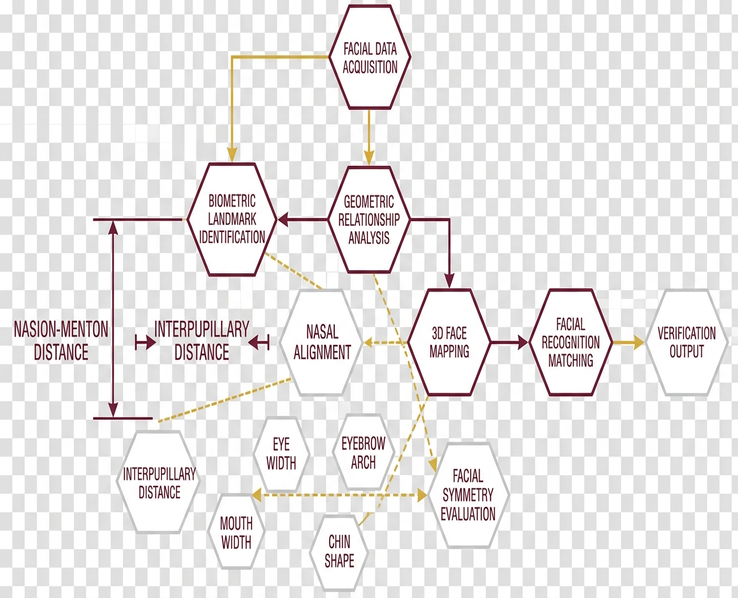
Facial profiling works best when it includes touch, measurement, and observation in motion. A flat photograph can hide projection, bridge depth, cheek prominence, and asymmetry. In practice, the zygomatic arch and temporal width tell more than a front-facing image alone.
Identify the widest point
The first question is simple: where is the face widest? On some faces, the forehead dominates. On others, the cheekbones form the widest structure. A jaw-dominant face carries width lower, near the mandible.
This matters because frame endpieces should not disappear inside the facial outline, nor should they extend so far that the frame looks borrowed. A measured fit commonly places the endpieces 2 to 3 millimeters beyond the widest facial point. That small margin gives the frame enough visual presence without overextending the hinge line.
Evaluate jawline curvature
The jawline determines how much contrast the lower rim can provide. A softly curved jaw can tolerate more angularity in the frame. A strong, straight jaw often looks more balanced when the lower rim carries curve or lift.
The optician should watch the patient speak and smile. A frame that looks correct at rest may ride on the cheeks once the face moves. Typology pairings are finalized by comparing the lower rim curvature with the patient’s jawline angle and confirming that the frame’s lowest point stays off the cheek during a natural smile.
Measure length, width, and working dimensions
During protocol evaluations, facial length versus width establishes the baseline profile. The measurement does not label the patient as one fixed “face shape”; it shows which proportions need balance.
- Measure or estimate the facial width at the temporal bones and cheekbones.
- Compare the vertical facial length with the visible width.
- Confirm binocular pupillary distance, which commonly ranges from 54 to 74 millimeters in adults.
- Check whether available temple lengths, often spanning 135 to 150 millimeters, can secure the frame without pressure.
- Compare the bridge design against the patient’s nasal bridge height, width, and projection.
Bridge fit varies sharply across facial profiles. Some Caucasian facial profiles tolerate standard nose pad placement or molded bridges; many Asian facial profiles need universal-fit bridges, adjusted pads, or built-up nose pads to prevent sliding and cheek contact. The point is not ethnicity as a shortcut. The point is to recognize that bridge anatomy changes the entire frame position.
The Principle of Geometric Contrast in Eyewear
The core styling rule is contrast: frames should counterbalance natural facial contours rather than repeat them exactly. This is where optical styling becomes more analytical than decorative.
During clinical styling workshops, practitioners initially tried matching round frames to round faces to create thematic harmony. That approach was quickly discarded because it made soft contours look less defined. Contrast gave the face a clearer boundary.
When angular frames help
Angular frames add structure to rounded cheeks, soft jawlines, and faces with similar length and width. A rectangular frame can create a stronger horizontal line across the brow and a cleaner lower boundary near the cheek.
This does not mean every round face needs a severe rectangle. The better question is how much structure the face can accept before the frame starts looking rigid. A slightly squared oval may work better than a hard-edged rectangle for someone with a small face, narrow bridge, or gentle features.
When curved frames help
Curved or circular frames soften sharp jawlines and prominent cheekbones. On a square or diamond-influenced face, a rounder lens shape can reduce the visual weight of the jaw and shift attention toward the eyes.
Evidence strength here is practical rather than diagnostic. Geometric contrast does not treat disease, and it does not replace refraction. It helps the frame sit in better proportion to the face, which improves acceptance and daily use.
Recommendation: Use contrast as a starting rule, then confirm it with fit mechanics: pupil position, bridge stability, temple comfort, and cheek clearance.
Frame Typology Pairings by Face Profile
Once measurements establish the facial profile, typology pairings narrow the frame field. The goal is not to force a person into a category. The goal is to remove shapes that are likely to exaggerate imbalance or compromise fit.
Round faces
Round faces often benefit from rectangular, square, or geometric frames because those shapes add definition. The upper rim can create a clean brow line, while the lower rim introduces structure near the cheek.
For a patient with a round face and a moderate prescription, the optician should test a rectangle with enough vertical depth for visual comfort but not so much height that the lenses become visually heavy. If the frame endpieces extend 2 to 3 millimeters beyond the widest facial point and the bridge remains stable, the frame usually reads intentional rather than oversized.
Square faces
Square faces carry visible structure through the forehead, cheek, and jaw. Oval and round frames soften that angularity and can make the face appear slightly longer.
Standard oval faces often work with B-measurements, or vertical lens heights, of 32 to 38 millimeters. That range gives enough lens depth for common single-vision use while avoiding unnecessary vertical bulk. The exact choice still depends on prescription, pupil height, and how the lower rim behaves during a smile.
Heart faces
Heart-shaped faces are wider through the forehead and narrower toward the chin. Bottom-heavy, rimless, or softly rounded frames can reduce the visual emphasis at the top of the face.
A heavy brow bar may make the forehead look broader. A light lower rim or rimless design can spread attention more evenly. Patients who like bold frames can still wear them, but the weight should not all sit above the eye line.
Risk Factor: If a frame rests on the cheeks, tilts forward, or shifts during speech, the face-shape match is not enough to justify the selection.
Clinical Limitations: When Prescriptions Dictate Shape
Prescription strength can override style theory. A frame may balance the face beautifully and still be the wrong optical platform.
High myopia and edge thickness
For prescriptions reported as roughly -6.00 diopters or higher, smaller and more rounded frames usually control edge thickness better than large rectangles. The restriction comes from decentration calculations: opticians compare the frame’s effective diameter with the patient’s pupillary distance to predict how much lens edge will remain after surfacing.
Large fashion frames can push the optical center far from the geometric center of the lens. That increases thickness, weight, and cosmetic distortion at the edge. In high myopia, the smartest-looking frame is often the one that keeps the lens small enough to make the prescription wearable.
Progressive lenses and vertical height
Progressive lenses need enough vertical space for distance, intermediate, and near zones. Minimum fitting heights commonly require 14 to 18 millimeters from the pupil center to the bottom of the lens, depending on the lens design.
A shallow frame may look elegant, but it can compress the useful corridor. When that happens, the patient may lift the chin to read or drop the eyes into the wrong zone during computer work. Aesthetic preferences must yield to optical requirements for optimal vision correction.
Astigmatism, wrap, and asymmetry
Patients with high astigmatism may experience spatial distortion when fitted with heavily wrapped or oversized frames. The lens angle changes how the eye receives the correction, especially away from the center. For these patients, flatter fronts, controlled vertex distance, and careful tilt often matter more than the trend of the season.
In asymmetric faces, shape theory steps aside while custom temple adjustments and bridge modifications take priority. This is the practical limitation of geometric contrast: it works best when the frame can first be made mechanically stable.
When to seek professional adjustment
- New glasses cause persistent eye strain after a reasonable adaptation period.
- The frame slides down and the wearer looks over the optical centers.
- One lens feels clearer than the other when the frame is lifted or tilted by hand.
- The temples leave deep marks or create soreness behind the ears.
- Progressive lenses require excessive head movement to find near or intermediate focus.
Frame selection works when facial geometry, lens design, and prescription limits are handled in the right order. Style still matters, but it performs best after the measurements have done their job.